Farm and Season Systems
How farming works in Harvest Moon: Echoes of Teradea: moving your farm between villages, soil quality, crop rotation, mutations, grass and animal feed.
Your farm can be moved between villages using the vacant-land signs, farming adds soil quality and crop rotation, crop mutations return from earlier games, and grass planted from seeds needs no watering and regrows for several harvests.
Farming in Harvest Moon: Echoes of Teradea is not a side activity you squeeze between adventures — it is the income and the stamina engine that lets you adventure at all. This page covers how the farm itself works: where it can live, how soil and rotation change planning, and how to feed animals without wasting a day.
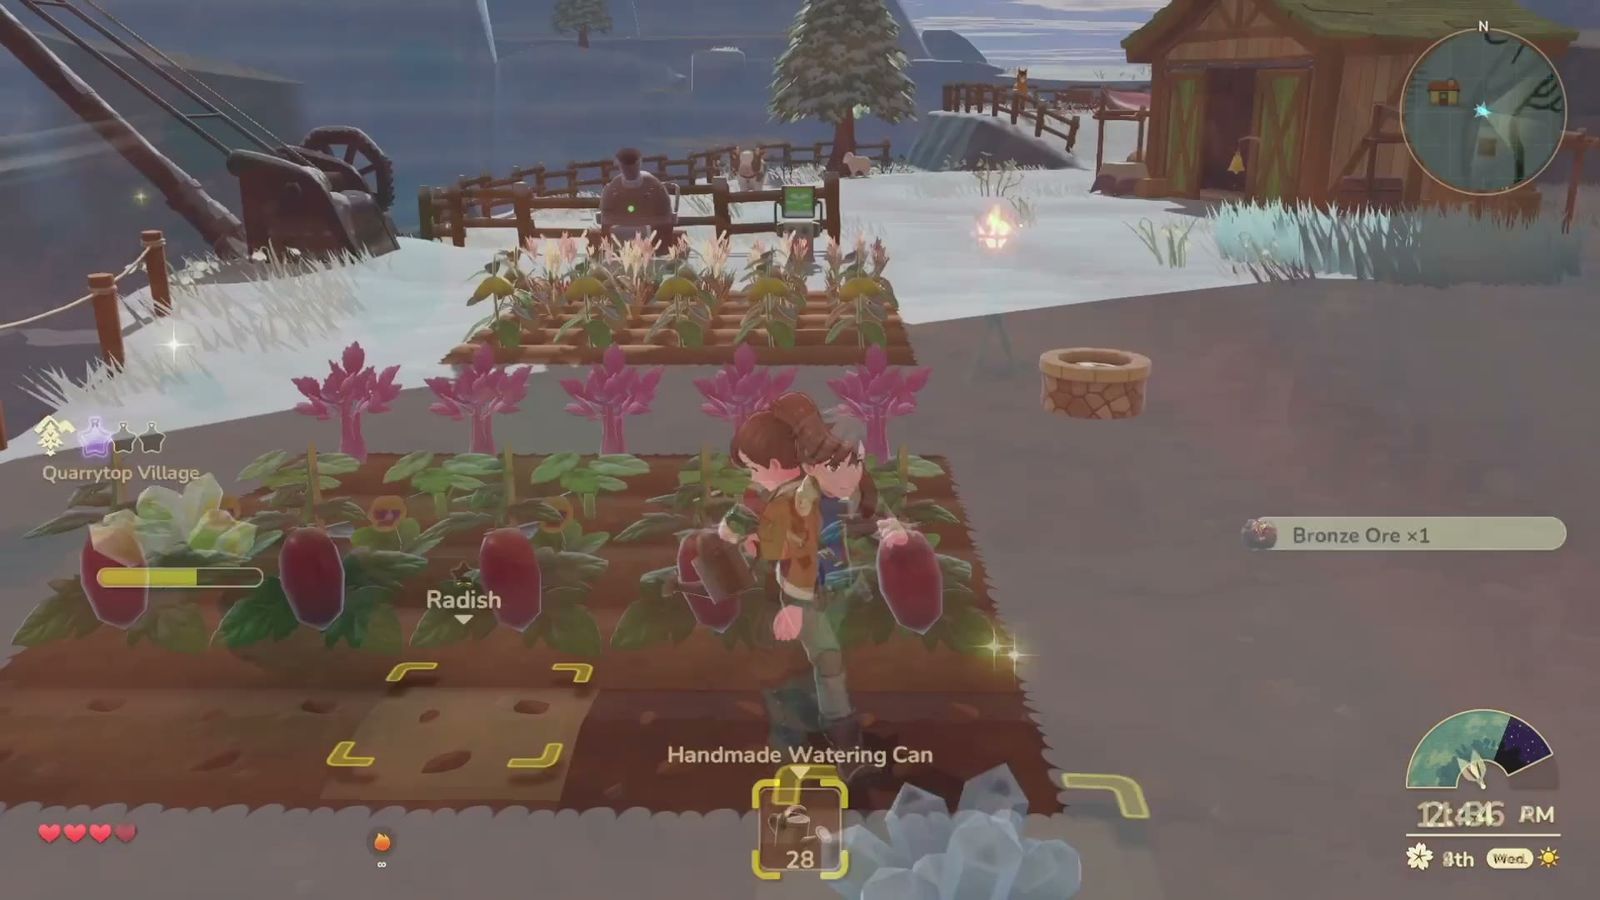
Official launch-trailer frame — hands on a radish bed. Watering and harvesting stay manual; grass does not need you.
Your farm can move between villages
The farm is not permanently anchored to Bloomfield. You examine vacant land signs in various locations and move your farmhouse and your animal barn there. That matters more than it sounds: seed shops are village-specific, so where your farm sits decides which seeds are a short walk away and which ones are a trek.
Practically, this means you can follow the story from village to village and keep farming from a nearby base instead of commuting across the continent every morning. Move when the journey to your current crop rotation becomes the slow part of your day.
Soil quality and crop rotation
Farming here adds two layers that earlier Harvest Moon games did not always carry:
- Soil quality — the ground you plant into is not uniform, and quality affects what a bed is good for.
- Crop rotation — planting the same thing in the same place forever is not the intended pattern; rotating what grows where is a system the game tracks.
The design intent is the same one that shows up in every real farming game: freshness is a resource. Rotate, and the same plot keeps paying out.
Crop mutations
Mutations are back. A crop grown under the right conditions can come up as a variant rather than the plain version, which is a trading and gifting opportunity rather than an obstacle. If a bed produces something you did not plant, that is the system working, not a bug.
Because mutation conditions are not published anywhere official, the reliable move is to experiment inside a small, controlled patch and keep notes rather than converting your whole field to a guess.
Grass is the cheapest feed you will ever get
- Grass seeds do not need watering. Plant them and they grow on their own.
- Each planting is harvestable two or three times.
- A forest sprite on your own farm gives three free grass seeds every third day. Find the ledge on your property and check back on that cycle.
- Grass can be put into the feed maker to produce animal feed, and feed placed in the pens is handled automatically.
The obvious comparison is cutting weeds, which takes twenty weeds per single feed. Grass is the same output for a fraction of the effort, and the sprite keeps restocking you for free.
Feeding animals without wasting your morning
Any food item can be given directly to an animal and counts as feeding it. A forage mushroom works. This skips the craft-a-feed loop entirely and is the single biggest time saver in the early farm routine.
Two rules that come with it:
- Feed your animals before you let them out. Hungry grazing animals will eat your growing crops.
- Fence your crops if you plan to let animals roam. A fence removes the risk permanently.
Watering and tools
Your starting watering can is a handmade one — the basic tier, and the one you will use on every bed until you upgrade. Watering and harvesting are manual actions; only grass skips the water step. Because of that, anything that shortens the walk between beds (a better layout, a tighter plot, a barn placed next to the field) is effectively a stamina upgrade.
A farm routine that survives the story
- Feed the animals first, then release them.
- Water and harvest the beds you can reach before your stamina dips.
- Head out with a companion and a stack of food.
- Return, water anything left, and bank the day's produce.
That loop keeps the farm honest while the story pulls you across Teradea. Which crops are worth planting is on the crops page, the animals that supply it on livestock, and the tools themselves on tools and crafting. New players should read the beginner guide first.